Sunday, November 30, 2008
December Issue - Sneak Peeks
Sunday, November 23, 2008
You still have time...
November Blog Candy Blow Out - Winner #1
Using random.org, the winner of the "Blog About The Blow Out" candy is... Eveline!!!!
Eveline - I will be contacting you shortly.
The QueenKat Special Challenge Winner is...
Thanks to everyone who played along with us!
Amy - I will be contacting you shortly.
Saturday, November 22, 2008
Tell 'Em SheetLoad Sent Ya!
Did you know that some ads in the eZine include special offers for SheetLoad readers?!
Sunday, November 16, 2008
Special Challenge - and Prize - from Queen Kat Designs!!
!
We are a clear stamp company. All of our stamps are designed with love by stamp designers around the world. Our designs are always fun, funky and creative. Our home office is in Utah in the shadows of the Wasatch mountains. All of the stamps that QKD produces are made by hand and using only 1 chemical in the process (the actual polymer itself). We have eliminated harsh chemicals from our process to keep our employees healthy and the environment clean. QKD’s stamps are oh so sticky… They stick really well to acrylic blocks and wash up nicely. Although you know the saying, “a stained stamp is a well loved stamp”.
2. Upload it to your blog or an online gallery* no later than Midnight CST on Friday, November 21st.
*Must be a public gallery - no login needed to view files
3. Leave a comment on this post with a direct link to your creation AND the name of your favorite stamp set from Queen Kat's Online Store.
4. Sit back and relax. The winner, chosen at random, will be announced soon.
Here is what you can win...
Here is some inspiration from QKD's design team...
Saturday, November 15, 2008
Beyond the Card Challenge
For some ideas, you can check out the last page of the November issue.
A winner will be chosen at random and will share some of the goodies from our November Blog Candy Blow Out!!
Here is what you have to do...
- Create something "beyond the card" using the November sketch as inspiration.
- Upload your creation to our BRAND NEW ShortCuts Online Gallery in the November '08 - Beyond the Card Album. (You must register to upload photos.)
- Leave a comment on this thread with a direct link to your creation in the gallery no later than Midnight CST on Sunday, November 30th.
- The winner will be announced here during the first week of December.
The "fine print"...
- Links must go directly to your entry in our online gallery. Your creation must be uploaded to the correct album to be considered. You can create a blog post with your entry, but you must also upload to our gallery.
- If your comment does not link to a blog with "contact me" info, you MUST leave your email address in your comment. You are free to add spaces to avoid spam bots.
- Your entry must be papercrafting, related.
Friday, November 14, 2008
SheetLoad Shows You How - Mini Magazine Holder
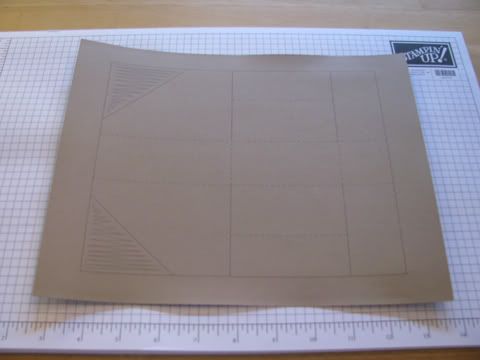
I designed a simple cutting/scoring guide in Illustrator, printed it on a standard-sized piece of cardstock and went to town!
My final creation was featured in the "Beyond the Card" section of this month's SheetLoad of Cards.
A special "Thanks" goes out to Becky for letting me share her idea with SheetLoad readers. (The printable PDF file linked below is my creation. I used her download file for dimensions, etc...)
On to the tutorial...
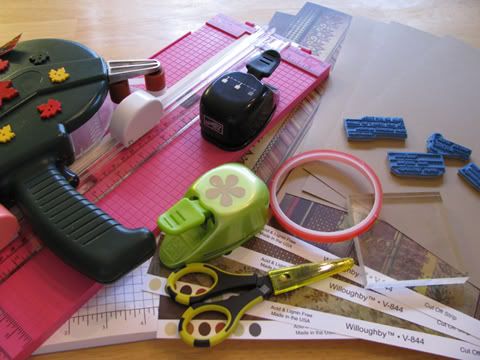
Step 1: Gather your supplies
Besides the standard crafting supplies (paper, cardstock, adhesive, etc...) you will need a scoring tool/board, coordinating ribbon (optional - and not shown on my sample), Envelopes for 3x3 cards and a printer that will print on cardstock (optional).
I also grabbed some of my favorite punches and sentiment stamps to create the 3x3 cards with.
Step 2: Print Page 1 of the Mini Magazine Holder Template file on to your 8.5" x 11" cardstock.
If you don't have access to a printer, or yours won't accept cardstock, you can use page two of the file and follow the cutting and scoring dimensions to create your holder.
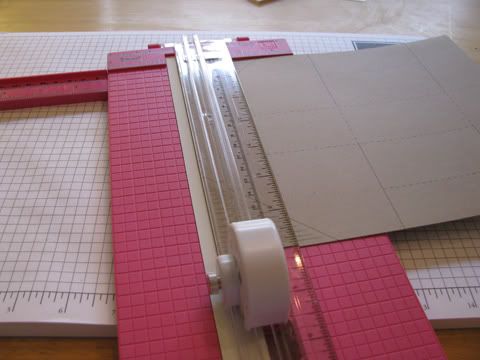
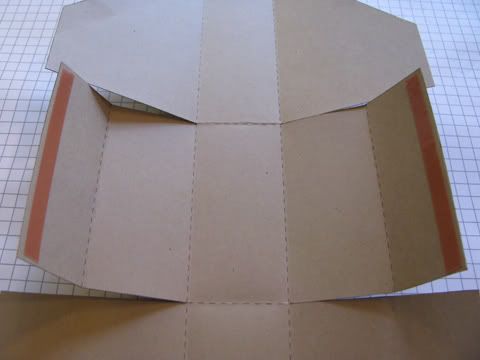
Step 3: Cut and score the cardstock and pre-fold all of the scored lines.
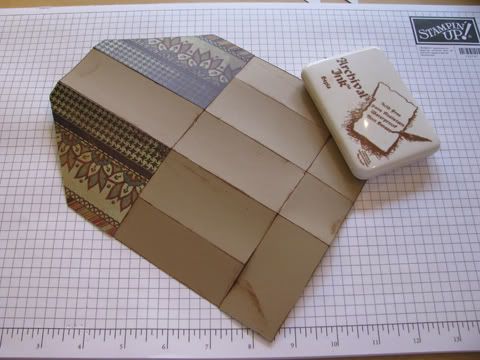
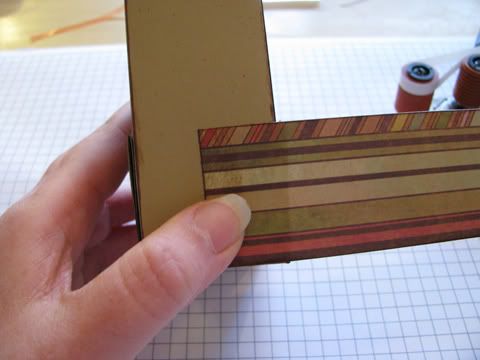
Step 4: Cover the outside slanted pieces with patterned paper of your choice.
After adhering the paper, I also went ahead and inked all of the edges. You could also add PP to the rectangular section between the two slanted pieces if you wish.
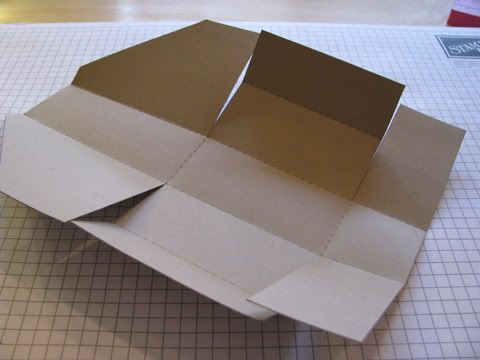
Step 5: Place adhesive on the edges of the inside-middle flaps; as shown here.
You will want to use a strong, permanent adhesive.
Step 6: Fold the bottom flaps up and in. Remove the liner from the tape on the edges (if applicable) and fold in around the bottom flap.
Step 7: Place adhesive on the outside, slanted flaps.
Step 8: Fold the slanted flaps up and in; adhere them to the inside of the bottom "tray".
Step 11: Decorate 4 - 3" x 3" cards to go into your holder.
I used the sketch from the November issue for my cards.
Thursday, November 13, 2008
Show Us Your SheetLoad and Win - November!!
This month's winners will share some of the goodies from our November Blog Candy Blow Out!!
Here is what you have to do...
- Create one (1) card using November issue.
- Upload your card to our BRAND NEW ShortCuts Online Gallery in the November Show Us Your SheetLoad Album. (You must register to upload photos.)
- Leave a comment on this thread with a direct link to your card in the gallery no later than Midnight CST on Sunday, November 30th.
- Winners will be announced here during the first week of December.
Here is what you can win...
Two (2) lucky winners be be chosen to receive a selection of stamps from our November Blog Candy Blowout Booty!!!
Make sure to do your best work, as I will be asking some of my SheetLoad team members to choose their favorite cards, to help select the two winners.
The "fine print"...
- Links must go directly to your entry in our online gallery. Your cards must be uploaded to the correct folder to be considered. You can create a blog post with your entry, but you must also upload to our gallery.
- If your comment does not link to a blog with "contact me" info, you MUST leave your email address in your comment. You are free to add spaces to avoid spam bots.
- Only one entry per person. You are free to upload more than one card inspired by the November issue, but the non-entry cards should go in the November 08 - Reader Cards Album.
ETA: You may enter a full SheetLoad, but all of the cards in the picture should be similar and from the same issue.
Wednesday, November 12, 2008
Featured Products - TheAngelCompany
This month, because sample cards used different products, I thought I would share some of the awesome products we received in a post.
Creative Cling™ Stamps
You will love their revolutionary Creative Cling™ Stamping System! This system is fast, easy to use and can maximize your storage space. The premium quality, deeply etched, vulcanized stamps combined with Creative Cling™ foam-backing mounting cushion ensures you crisp, clean and clearly stamped images.
Some of the stamp sets seen in the issue (click on thumbnails to go shopping)...
Exclusive Papers
TAC continues their quest to provide unique and innovative products for the paper crafter. In doing so they are excited to introduce four fabulous paper collections that are exclusive to theangelcompany™ - soarwithitcollection™, wingitcollection™, designercollection™ and flywithitcollection™. They are confident that each collection will inspire and enrich your creative journey as you put the “pop” in your art, the “wow” in your projects, and the “pizzazz” in your layouts.