I designed a simple cutting/scoring guide in Illustrator, printed it on a standard-sized piece of cardstock and went to town!
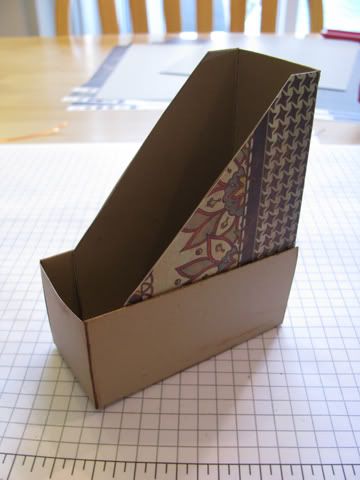
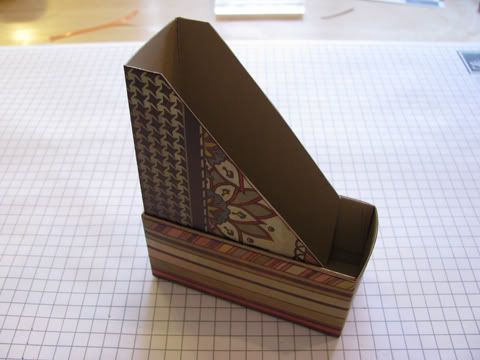
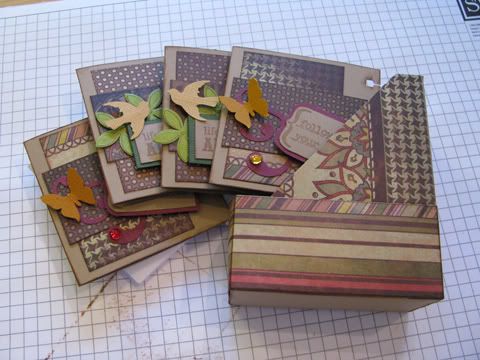
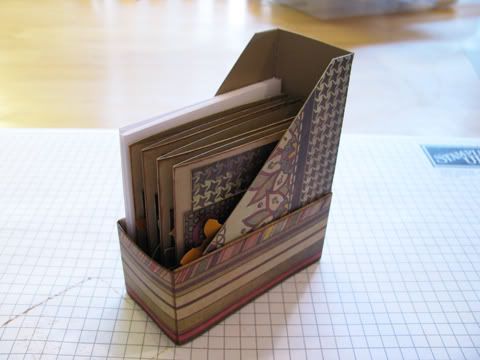
My final creation was featured in the "Beyond the Card" section of this month's SheetLoad of Cards.
A special "Thanks" goes out to Becky for letting me share her idea with SheetLoad readers. (The printable PDF file linked below is my creation. I used her download file for dimensions, etc...)
On to the tutorial...
Step 1: Gather your supplies
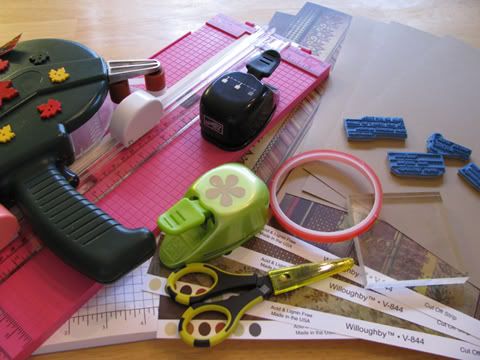
Besides the standard crafting supplies (paper, cardstock, adhesive, etc...) you will need a scoring tool/board, coordinating ribbon (optional - and not shown on my sample), Envelopes for 3x3 cards and a printer that will print on cardstock (optional).
I also grabbed some of my favorite punches and sentiment stamps to create the 3x3 cards with.
Step 2: Print Page 1 of the Mini Magazine Holder Template file on to your 8.5" x 11" cardstock.
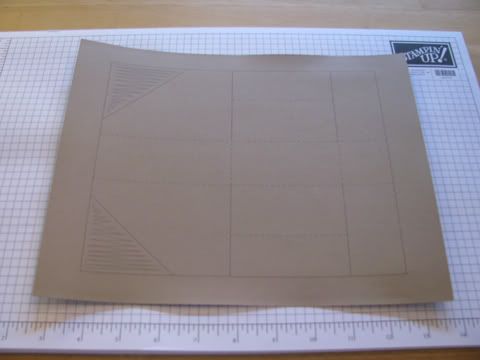
If you don't have access to a printer, or yours won't accept cardstock, you can use page two of the file and follow the cutting and scoring dimensions to create your holder.
**Make sure to set "scaling" to "none" when printing. If you don't, your printer may shrink the template.**
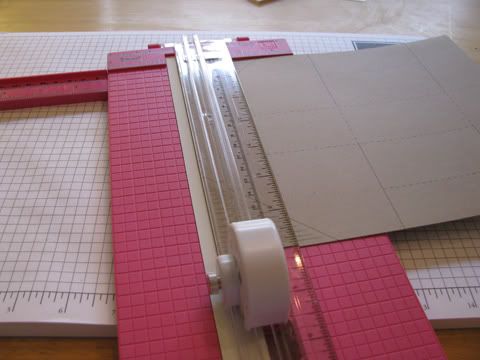
Step 3: Cut and score the cardstock and pre-fold all of the scored lines.
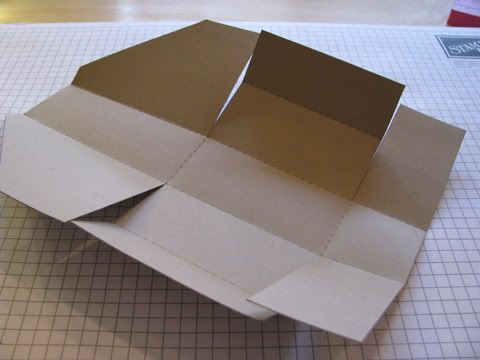
Step 4: Cover the outside slanted pieces with patterned paper of your choice.
Step 3: Cut and score the cardstock and pre-fold all of the scored lines.


Step 4: Cover the outside slanted pieces with patterned paper of your choice.
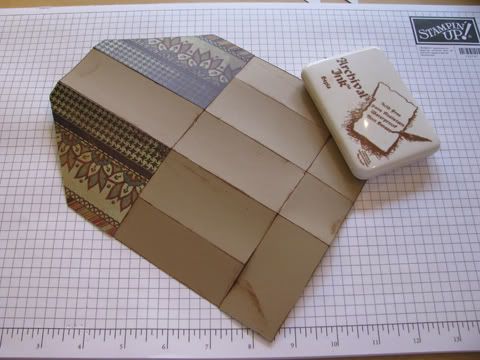
After adhering the paper, I also went ahead and inked all of the edges. You could also add PP to the rectangular section between the two slanted pieces if you wish.
Step 5: Place adhesive on the edges of the inside-middle flaps; as shown here.
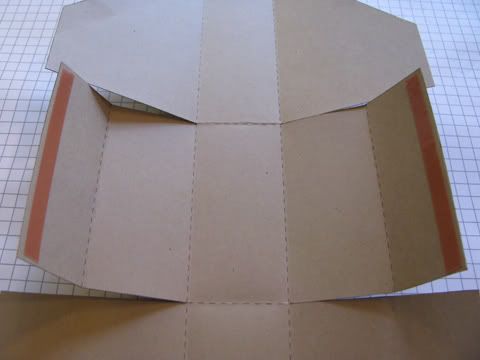
You will want to use a strong, permanent adhesive.
Step 6: Fold the bottom flaps up and in. Remove the liner from the tape on the edges (if applicable) and fold in around the bottom flap.
Step 7: Place adhesive on the outside, slanted flaps.
Make sure to keep the tape at or below the "point" where the straight and slanted edges meet.
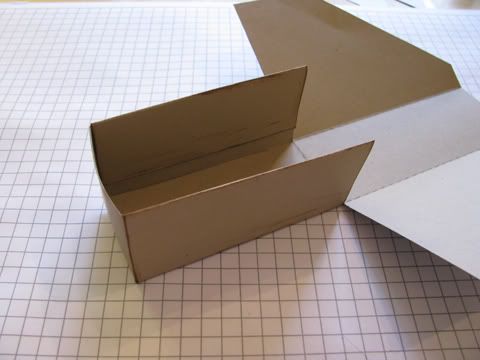
Step 8: Fold the slanted flaps up and in; adhere them to the inside of the bottom "tray".
Step 8: Fold the slanted flaps up and in; adhere them to the inside of the bottom "tray".
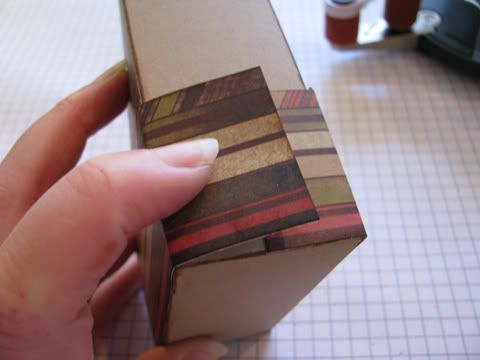
Step 10: Starting in the back-middle (so the overlap is hidden) wrap the paper strip around the outside of the tray.
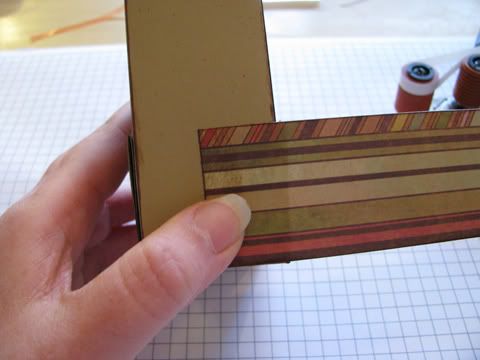
Step 10b - optional: If you would like to add ribbon around edge of the tray, do so now. To see a sample that uses ribbon, check out Becky's sample.
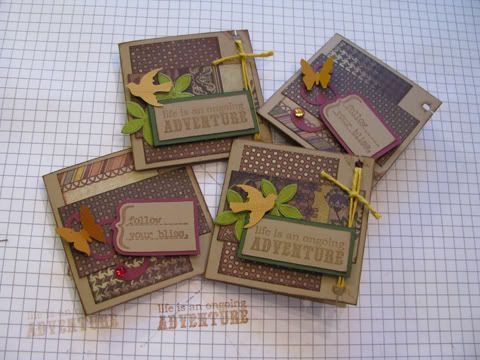
Step 11: Decorate 4 - 3" x 3" cards to go into your holder.
I used the sketch from the November issue for my cards.
If you create a mini magazine holder using the tutorial above, please share it in our NEW online gallery. Once you register, you can place it in the November - Beyond the Card Gallery.

9 comments:
Wow - very neat little box.
Adorable!!!
This is so cool! Have to try it!
Love this! I think I will be using it to package all the cards I am making as gifts this year!
Thanks for the great idea!
Oh my! That is just adorable. I'll have to give making one a try!
This was so fun to make.
Off to post mine in the gallery...
totally adorable! I am so making one this weekend. wooohoo!
Love the magazine/card holder box. Thanks for sharing.
Alex from England x
11.26pm
LOVE this box; no idea how i missed it when it was originally posted :)
Post a Comment